
Photography: Techniques and Tips
Photography, as a form of art and communication, has become increasingly popular in the digital age. With the advent of smartphones and affordable DSLR cameras, capturing moments and expressing oneself through images has never been easier. However, mastering the techniques of photography requires more than just point-and-shoot skills. This article aims to provide an overview of various photography techniques and tips that can enhance one’s ability to capture compelling visuals.
Consider this hypothetical scenario: Sarah is an aspiring photographer who recently purchased her first DSLR camera. Excited about exploring the world of photography, she quickly realizes that there is much more to it than simply pressing a button. Sarah encounters challenges such as blurry or poorly exposed images, struggling with composition, and understanding how different settings on her camera can affect the final outcome. To overcome these obstacles and improve her skills, Sarah embarks on a journey to learn about various techniques and gather useful tips from experienced photographers.
In this article, we will delve into fundamental aspects of photography such as exposure control, composition guidelines, lighting techniques, and post-processing methods. Understanding exposure control allows photographers like Sarah to achieve optimal brightness levels in their photographs while maintaining desired depth-of-field effects. Additionally, learning composition guidelines helps create visually pleasing images by considering elements such as rule of thirds, leading lines, symmetry, and framing. These guidelines assist in arranging the main subject and other elements within the frame to create a balanced and harmonious composition.
Furthermore, mastering lighting techniques is crucial for photographers like Sarah to capture images with the desired mood and atmosphere. Understanding concepts such as natural light, artificial light, diffused light, and backlighting enables photographers to manipulate lighting conditions to enhance their photographs. Additionally, learning how to use reflectors or external flash can help control light intensity and direction.
Post-processing methods play a vital role in enhancing the final outcome of an image. Sarah can learn about popular software tools like Adobe Lightroom or Photoshop that offer various editing features such as adjusting exposure levels, color correction, cropping, and applying filters. Understanding these post-processing techniques allows photographers to transform ordinary photos into stunning visual narratives.
In addition to technical aspects, exploring different genres of photography can help Sarah discover her niche and develop a unique style. Genres such as landscape photography, portrait photography, street photography, wildlife photography, and macro photography each have their own set of challenges and require specific techniques. By experimenting with different genres, Sarah can gain valuable experience while discovering her passion.
As Sarah embarks on her journey in photography, it is essential for her to practice regularly and seek feedback from other photographers or mentors. Joining communities or online forums dedicated to photography provides opportunities for learning from experienced individuals who can provide constructive criticism and guidance.
In conclusion, mastering the techniques of photography requires dedication, practice, and continuous learning. By understanding exposure control, composition guidelines, lighting techniques, post-processing methods, exploring different genres of photography, and seeking feedback from others in the field; aspiring photographers like Sarah can elevate their skills and capture compelling visuals that communicate their artistic vision effectively.
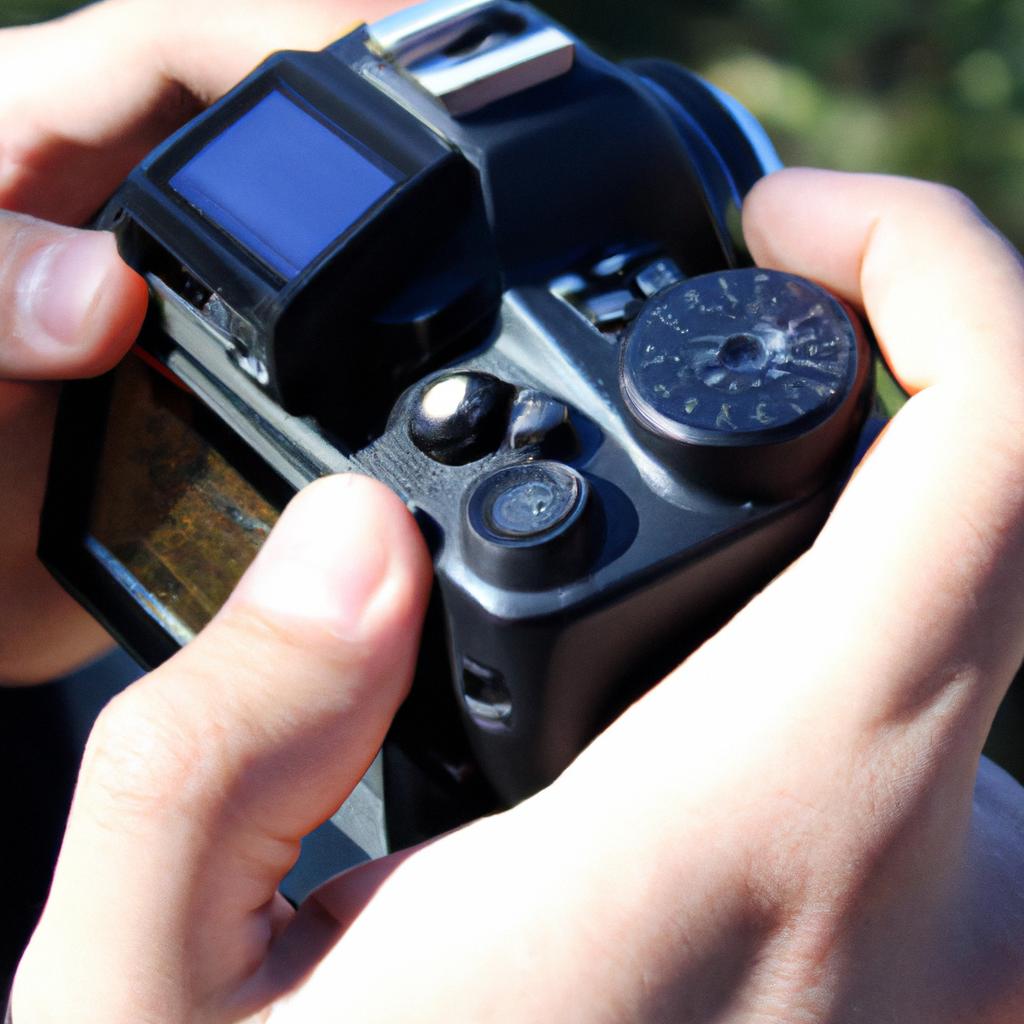
Understanding the camera settings
Understanding the Camera Settings
Photography is a powerful medium that allows us to capture moments and express our creativity. However, mastering photography requires more than just pointing and shooting. One crucial aspect of becoming a skilled photographer is understanding the camera settings. By familiarizing ourselves with these settings, we can have greater control over our photographs and achieve the desired results.
To illustrate this point, let’s consider a hypothetical scenario where you are capturing a landscape photograph during sunset. In order to accurately capture the vibrant colors of the sky, it becomes essential to understand how various camera settings impact the final image. Adjusting the exposure compensation might be necessary to prevent underexposure or overexposure in challenging lighting conditions. Additionally, setting the white balance correctly will ensure that the colors appear natural and true-to-life.
To further delve into the world of camera settings, here are some key considerations:
- ISO: This refers to your camera’s sensitivity to light. Increasing the ISO can help in low-light situations but may introduce noise.
- Shutter speed: Controlling how long your camera’s shutter remains open affects motion blur and freezing action.
- Aperture: The aperture determines how much light enters through your lens and influences depth of field.
- Focus mode: Depending on your subject’s movement or stillness, selecting between single focus or continuous focus can make all the difference.
Embracing these concepts enables photographers to take their skills to new heights by adapting their approach based on different scenarios and creative visions. With an awareness of each setting’s role in shaping photographic outcomes, one can confidently experiment with them while striving for exceptional results.
As we move forward in exploring techniques that enhance our photography skills, let us now turn our attention towards mastering the use of aperture. Understanding how aperture impacts depth of field opens up possibilities for creating visually captivating images with varying degrees of sharpness and background blur.
Mastering the use of aperture
Understanding how to control aperture is essential in photography. Aperture refers to the opening within a camera lens that determines the amount of light entering through it. By adjusting this setting, photographers can manipulate depth of field and create stunning visual effects.
Consider a hypothetical scenario where you are capturing an image of a beautiful flower in a garden. To highlight the intricate details of the subject while blurring out distracting elements, using a wider aperture like f/2.8 would be ideal. This shallow depth of field isolates the flower from its surroundings, making it the focal point and creating an aesthetically pleasing composition.
To further enhance your understanding, let’s explore some key techniques related to mastering aperture:
- Aperture priority mode: Many cameras offer this feature, allowing photographers to set their preferred aperture value while enabling automatic adjustments for other settings such as shutter speed.
- Understanding f-numbers: The concept of f-numbers may seem perplexing at first glance but is crucial in comprehending aperture settings. Lower values (e.g., f/1.4) indicate larger apertures, resulting in shallower depths of field, whereas higher values (e.g., f/16) represent smaller apertures with greater focus range.
- Bokeh effect: Achieved by utilizing wide apertures, this technique creates dreamy out-of-focus backgrounds that add a sense of depth and beauty to photographs.
- Diffraction limitations: It is important to note that extremely small apertures (such as f/22 or beyond) can lead to diffraction, reducing overall image sharpness due to light waves bending around edges.
By mastering these aspects of aperture, photographers can unlock endless creative possibilities and elevate their images into captivating works of art.
Moving forward, we will delve into another vital aspect of photography – controlling the amount of light. Understanding how various lighting conditions impact your photographs is crucial for achieving the desired results.
Controlling the amount of light
Section H2: Mastering the Use of Aperture
The skillful manipulation of aperture can greatly enhance your photography. As you become more proficient in adjusting the size of the aperture, you will notice a significant improvement in the overall quality and impact of your images. To illustrate this point, imagine capturing a portrait with a wide-open aperture, such as f/1.8. The shallow depth of field achieved by using such a large aperture would beautifully isolate the subject from its surroundings, resulting in a visually striking image.
Understanding how to master the use of aperture requires familiarity with certain techniques and tips:
- Experiment with different apertures: Play around with various settings to explore the effects they have on your photographs. Switch between wide apertures for blurred backgrounds and narrow apertures for greater depth of field.
- Consider the lens characteristics: Different lenses have varying maximum and minimum aperture values. Understanding these limitations allows you to make informed decisions when selecting your equipment for specific shots.
- Be mindful of diffraction: While smaller apertures increase sharpness throughout an image, extreme small apertures (such as f/22) may introduce diffraction, reducing overall image clarity.
- Balance exposure considerations: Adjusting the aperture affects not only depth of field but also exposure. Remember that wider apertures let in more light while narrower ones allow less light through.
To further grasp these concepts, consider the following table outlining common lens apertures alongside their respective visual effects:
| Aperture | Visual Effect |
|---|---|
| Wide open (e.g., f/1.4) | Shallow depth of field; background blur |
| Moderate (e.g., f/5.6) | Balancing focus between subject and background |
| Narrow (e.g., f/16) | Greater depth of field; sharper details throughout |
In summary, mastering aperture involves experimenting with different settings, understanding lens characteristics, being mindful of diffraction, and maintaining a balance between exposure considerations. By effectively utilizing aperture, you can create visually compelling photographs with varying depths of field that suit your artistic vision.
Transitioning into the subsequent section about “Controlling the Amount of Light,” photographers must also optimize exposure to capture their desired images.
Optimizing exposure
Controlling the amount of light is a crucial aspect of photography, as it allows photographers to capture images with the desired exposure and achieve their creative vision. In the previous section, we discussed various techniques for controlling light in our photographs. Now, let us explore another important factor in achieving optimal exposure – optimizing exposure.
Imagine you are photographing a scenic landscape during golden hour, where the warm evening sunlight bathes everything in a soft glow. To optimize your exposure and capture the magical essence of this moment, consider these key points:
-
Metering Modes:
- Evaluative/Matrix: This mode analyzes the entire scene’s lighting conditions to determine an appropriate exposure level.
- Center-weighted average: It prioritizes metering based on the central area of your frame, which can be useful when there is a significant contrast between subjects and their surroundings.
- Spot/Partial: By measuring only a small spot or portion within your frame, you can ensure accurate exposure for specific elements that matter most.
-
Exposure Compensation:
Adjusting your camera’s exposure compensation setting allows you to override automatic settings and increase or decrease overall brightness levels. For example, if you’re capturing a snow-covered landscape, increasing positive exposure compensation will prevent the white snow from appearing grayish. -
Histogram Analysis:
Utilize your camera’s histogram feature to evaluate the distribution of tonal values in your image. A well-balanced histogram indicates proper exposure across shadow, mid-tone, and highlight areas. -
Bracketing:
Consider using bracketing techniques by taking multiple shots at different exposures—typically overexposed (plus), correctly exposed (zero), and underexposed (minus). This helps maximize chances of obtaining an ideal shot with perfect highlights and shadows.
By employing these optimization techniques effectively, photographers can enhance their ability to create visually compelling images that accurately represent their subjects’ true colors and tones.
Next up: Adjusting the shutter speed to capture motion and freeze time in our photographs.
Adjusting the shutter speed
adjusting the shutter speed. A well-adjusted shutter speed can greatly impact the final outcome of an image, ensuring clarity and capturing motion with precision.
Shutter speed refers to the length of time that your camera’s shutter remains open when taking a photograph. It determines how much light enters through the lens and onto the camera sensor. Different situations require different shutter speeds for optimal results. For instance, consider a hypothetical scenario where you are photographing a moving car on a busy street during daylight hours. To capture both the car in focus while maintaining a sense of motion blur in its surroundings, a slower shutter speed would be appropriate. On the other hand, if you were photographing wildlife or sports action where fast movement is involved, using a faster shutter speed would freeze those moments beautifully.
To effectively adjust your camera’s shutter speed, keep in mind these key techniques:
- Use manual mode: Take control over your camera settings by switching to manual mode. This allows you to have full creative freedom in determining the desired shutter speed.
- Consider focal length: The general rule of thumb suggests setting your minimum shutter speed equal to or greater than your focal length to avoid shaky images caused by handheld camera shake.
- Experiment with long exposures: By employing longer shutter speeds (typically above half a second), you can create stunning effects like light trails, starry skies, or silky smooth waterfalls.
- Capture high-speed subjects with short exposures: Fast-moving objects demand shorter exposure times to maintain sharpness and avoid motion blur.
Here are some key considerations when it comes to adjusting your camera’s shutter speed:
- Manual mode provides more control
- Focal length affects stability
- Long exposures enable creative effects
- Short exposures preserve details in fast-moving subjects
Incorporated table:
| Shutter Speed | Effect |
|---|---|
| Slow | Motion blur, light trails |
| Fast | Freezing motion, sharpness |
| Medium | Balancing motion and clarity |
By understanding these techniques and considering the specific requirements of your subject, you can confidently adjust your camera’s shutter speed to achieve desired outcomes.
Now that you have a better grasp on adjusting the shutter speed, let us move forward by exploring how to find the right ISO setting for your photographs.
Finding the right ISO setting
Imagine you are capturing a portrait photograph outdoors. You want to achieve a blurred background that beautifully highlights the subject, while keeping them in sharp focus. This effect is known as shallow depth of field and can be achieved by adjusting certain settings on your camera.
To understand how depth of field works, let’s consider an example. Suppose you are taking a photo of a flower with a distant mountain range in the background. By using a wide aperture (such as f/2.8), you can create a shallow depth of field where the flower appears crisp and detailed, while the mountains become softly blurred. On the other hand, if you choose a narrow aperture (like f/16), both the flower and the mountains will appear relatively sharper.
Here are some key points to keep in mind when working with depth of field:
- Aperture: The size of the lens opening determines how much light enters the camera and affects depth of field. A wider aperture (smaller f-number) creates a shallower depth of field, whereas a narrower aperture (larger f-number) results in greater overall sharpness.
- Focal Length: Longer focal lengths tend to produce more pronounced bokeh effects and shallower depths of field compared to shorter focal lengths.
- Distance between Subject and Background: The closer your subject is to the camera while maintaining distance from the background, the more prominent your shallow depth of field will be.
- Sensor Size: Cameras with larger sensors generally offer better control over depth of field than those with smaller ones.
Consider this table for further understanding:
| Setting | Effect |
|---|---|
| Wide Aperture | Shallow Depth of Field |
| Narrow Aperture | Greater Overall Sharpness |
| Long Focal Length | More Pronounced Bokeh |
| Short Focal Length | Lesser Bokeh Effects |
Understanding how these factors interact and experimenting with them will allow you to achieve the desired depth of field in your photographs.
Transitioning into the subsequent section about “Achieving Proper White Balance,” it is vital to note that capturing accurate colors is just as crucial as controlling depth of field.
Achieving proper white balance
Building upon our understanding of ISO settings, let us now delve into another crucial aspect of photography — achieving proper white balance. By carefully considering and adjusting the color temperature in your images, you can ensure accurate representation of colors and create visually appealing photographs.
One example that highlights the importance of white balance is capturing a landscape during sunrise or sunset. Imagine photographing a breathtaking sunset scene where vibrant hues paint the sky with shades of red, orange, and purple. To truly convey the beauty and atmosphere of this moment, it becomes essential to achieve an accurate white balance. Failing to do so may result in inaccurate color reproduction, leading to dull or unrealistic-looking images that fail to capture the essence of the scene.
To help you attain optimal white balance in your photographs, consider the following techniques:
- Use auto white balance (AWB) mode on your camera for convenience.
- Experiment with different white balance presets such as daylight, cloudy, shade, fluorescent, or tungsten based on lighting conditions.
- Utilize custom white balance by manually setting it according to specific light sources for precise color accuracy.
- Make use of gray cards or color calibration tools to establish a reference point for accurate white balancing.
Table: Common White Balance Presets
| Preset | Description |
|---|---|
| Daylight | Suitable for outdoor shots under direct sunlight. |
| Cloudy | Ideal for overcast days or when shooting in shadows. |
| Shade | Helps compensate for blue tones when shooting in shade. |
| Fluorescent | Corrects greenish cast often found in fluorescent-lit areas. |
| Tungsten | Removes excessive yellow hue produced by indoor tungsten lights. |
By implementing these techniques and utilizing the appropriate white balance settings depending on the lighting conditions, you will be able to enhance the overall quality of your photographs. Achieving accurate white balance not only ensures that colors appear natural and true to life but also allows you to convey the intended mood and atmosphere effectively.
Transition into the subsequent section about “Exploring creative lighting techniques”:
Now that we have covered the importance of achieving proper white balance, let us delve into another exciting aspect of photography: exploring creative lighting techniques. By manipulating light sources and understanding how they interact with your subject, you can add depth, drama, and visual interest to your images.
Exploring creative lighting techniques
Building upon the importance of achieving proper white balance, let us now delve into another crucial aspect of photography – exploring creative lighting techniques. By understanding how to manipulate light sources and utilize them effectively, photographers can elevate their images to new levels of visual interest and impact.
Paragraph 1:
For instance, consider a scenario where a photographer is capturing portraits in an outdoor setting during golden hour – the period shortly after sunrise or before sunset when the natural light has a warm, soft quality. In this case, using backlighting can create stunning silhouettes against colorful skies. The subject’s outline becomes beautifully outlined by the golden glow behind them, resulting in a captivating image that conveys emotion and drama.
Paragraph 2:
To further enhance your understanding of creative lighting techniques, here are some key strategies to experiment with:
- Rembrandt Lighting: This technique involves placing the main light source at an angle of approximately 45 degrees to one side of the subject’s face. It creates a distinctive triangular-shaped highlight on the cheek opposite the light source while casting subtle shadows on the other side.
- Split Lighting: By positioning the main light directly at a right angle to the subject, split lighting divides the face into equal halves—one illuminated and one in shadow. This technique produces bold contrasts and emphasizes facial features.
- Rim Lighting: Employed primarily for subjects with interesting shapes or textures (such as flowers or architectural details), rim lighting occurs when you position the primary light source behind your subject. This illuminates its edges or outlines it with a beautiful halo effect against darker surroundings.
- Light Painting: A more experimental approach, light painting involves using handheld light sources like flashlights or LED panels to selectively illuminate specific areas within a longer exposure shot. This technique allows for infinite possibilities for creating unique patterns and designs.
Paragraph 3:
As demonstrated above, mastering various creative lighting techniques can greatly enrich your photographic repertoire. By thoughtfully considering the interplay of light and shadow, you can infuse your images with mood, depth, and a sense of narrative.
Transition into the subsequent section:
With creative lighting techniques now at our disposal, let us move on to explore how filters can enhance and transform ordinary scenes into something truly remarkable.
Using filters for unique effects
In the previous section, we delved into the world of creative lighting techniques and how they can enhance your photography. Now, let’s shift our focus towards another powerful tool that can add a unique touch to your images – using filters for unique effects.
Imagine you are photographing a serene landscape during golden hour, with the sun casting a warm glow over everything in sight. To capture this enchanting scene with more intensity, you could utilize a graduated neutral density filter. This type of filter helps balance the exposure between the bright sky and darker foreground, resulting in well-balanced landscapes. By reducing the amount of light entering the camera from one side, these filters enable you to create stunning compositions where both elements are perfectly exposed.
When it comes to exploring different filters for your photography, here are some options worth considering:
- Polarizing Filters: These filters reduce glare and reflections while enhancing color saturation. Ideal for shooting landscapes or any scenario involving water bodies.
- Infrared Filters: With their ability to block most visible light and allow only infrared wavelengths through, these filters produce ethereal and dreamlike photographs.
- Color Graduated Filters: Designed to add artistic flair to your images, these filters come in various colors and intensities that can be used creatively to alter tones within specific areas of your composition.
- Soft Focus Filters: By introducing intentional softness or blurring effects into your photos, these filters help create a romantic or nostalgic atmosphere.
To further understand the impact of utilizing different filters on your photography journey, take a look at this table showcasing examples of how each filter affects an image:
| Filter Type | Effect |
|---|---|
| Polarizing Filter | Reduces glare and enhances color saturation |
| Infrared Filter | Produces ethereal and dreamlike photographs |
| Color Graduated Filter | Adds artistic flair by altering tonal qualities |
| Soft Focus Filter | Introduces softness or blurring effects for a romantic or nostalgic look |
By experimenting with various filters, you can elevate your photography to new heights. These tools offer endless possibilities and allow you to add a touch of creativity and uniqueness to your images. Understanding the impact of focal length, our subsequent topic, will further enhance your ability to capture stunning photographs that truly captivate viewers.
Now let’s explore how understanding the impact of focal length can take your photography skills even further.
Understanding the impact of focal length
Section: Understanding the Impact of Focal Length
Now, let us delve into another crucial aspect that greatly influences the outcome of your photographs – focal length. To illustrate its significance, imagine a scenario where you are capturing an awe-inspiring landscape with your camera.
Focal length refers to the distance between the lens and sensor or film plane, affecting how much of a scene is captured and the perspective it creates. For instance, if you use a wide-angle lens with a short focal length such as 24mm, you can capture more of the scene within your frame. This allows for expansive landscapes or crowded cityscapes to be captured in their entirety while creating a sense of depth by exaggerating objects closer to the camera.
Understanding how different focal lengths impact your images is essential for achieving desired results. Here are some key points to consider:
- Wide-angle lenses: These have shorter focal lengths (e.g., 24mm), allowing you to capture broad scenes and emphasize foreground subjects.
- Standard lenses: With moderate focal lengths (e.g., 50mm), they closely resemble human vision and are ideal for portraits and everyday photography.
- Telephoto lenses: Longer focal lengths (e.g., 200mm) enable capturing distant subjects with great detail, compressing distances and creating stunning background blur.
- Zoom lenses: Offering variable focal lengths (e.g., 18-55mm), these versatile options provide flexibility in framing compositions without changing lenses.
To further grasp the impact of various focal lengths on image composition, refer to the table below showcasing example scenarios:
| Focal Length | Composition Effect |
|---|---|
| Wide-angle | Expansive views |
| Standard | Natural perspective |
| Telephoto | Compressed background |
| Zoom | Versatile framing |
By understanding the effects of focal length and incorporating this knowledge into your photography, you can elevate your compositions to new heights. Remember, capturing captivating photographs requires a combination of technical know-how and artistic vision, both of which you are well on your way to mastering.
Composition tips for captivating photos
Understanding the impact of focal length in photography is crucial for capturing visually compelling images. By adjusting the focal length, photographers can alter the perspective and depth of field in their photos, resulting in unique compositions that convey different emotions and narratives.
For instance, let’s consider a hypothetical scenario where a photographer wants to photograph a landscape scene with mountains in the background and flowers in the foreground. Using a wide-angle lens with a short focal length, such as 24mm, would allow them to capture most of the scenery within the frame. This broad perspective emphasizes the vastness of the landscape and creates a sense of grandeur. On the other hand, using a telephoto lens with a longer focal length like 200mm would compress the elements in the frame, making it appear as if the mountains are closer to each other than they actually are. This compression effect adds drama and intensity to the image.
To further explore how focal length impacts composition, here are some key considerations:
- Subject isolation: A longer focal length can create narrower depth of field, which helps isolate subjects from distracting backgrounds.
- Perspective distortion: Wide-angle lenses tend to exaggerate perspectives by distorting straight lines near the edges of an image.
- Lens weight: Longer focal lengths typically result in heavier lenses, making them more challenging to carry around during outdoor shoots.
- Cost implications: High-quality telephoto lenses often come at higher price points compared to wider angle options due to complex optics involved.
Incorporating these techniques into your photographic practice opens up endless creative possibilities. Experimenting with different focal lengths allows you to tell stories through varied visual interpretations.
Moving forward into our next section on “Composition tips for captivating photos,” we will delve deeper into guiding principles that enhance overall image aesthetics while maintaining technical proficiency.
Managing photography finances
Building on the importance of composition, effective management of photography finances is crucial for photographers to sustain their practice. By understanding how to handle financial aspects, photographers can ensure long-term success in their craft.
Managing Photography Finances
To illustrate the significance of managing photography finances, consider a hypothetical scenario involving a freelance photographer named Sarah. Despite her exceptional skills behind the camera, Sarah struggles with pricing her services appropriately and keeping track of expenses. As a result, she often undercharges clients and ends up losing money due to unanticipated costs. This emphasizes the need for proper financial management within the field of photography.
The following bullet point list outlines key strategies that photographers can adopt to effectively manage their finances:
- Maintain detailed records of income and expenses
- Set clear pricing structures based on industry standards and personal expertise
- Regularly review and adjust prices to reflect changes in overhead costs
- Seek professional advice or attend workshops on financial management specific to photography
Additionally, utilizing tables can provide visual clarity when discussing finance-related topics. Below is an example table showcasing common photography expenses faced by professionals:
| Expense | Description | Average Cost |
|---|---|---|
| Camera equipment | Cameras, lenses, tripods | $2,000 – $10,000 |
| Studio rental | Space for indoor shoots | $500 – $1,500/month |
| Marketing materials | Business cards, website development | $100 – $1,000 |
| Professional fees | Accounting services, legal consultations | Varies |
By considering these expenses alongside income sources such as client bookings or print sales, photographers gain a clearer understanding of potential profit margins and necessary pricing adjustments.
In summary, mastering financial management plays a vital role in maintaining success as a photographer. Through record-keeping, proper pricing strategies, and seeking professional advice, photographers can ensure financial stability while focusing on their creative pursuits. By incorporating these techniques into their practice, photographers like Sarah can overcome the challenges associated with managing photography finances and thrive in a competitive industry.
Note: The use of markdown to format bullet points and tables may not be supported in this text-based interface. Please imagine the appropriate formatting when reading through the section.